
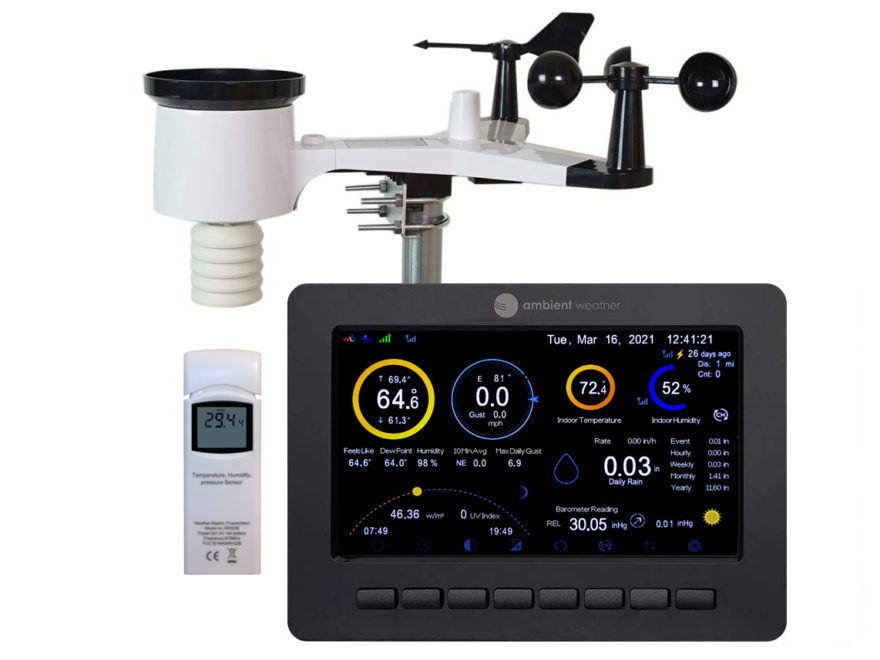
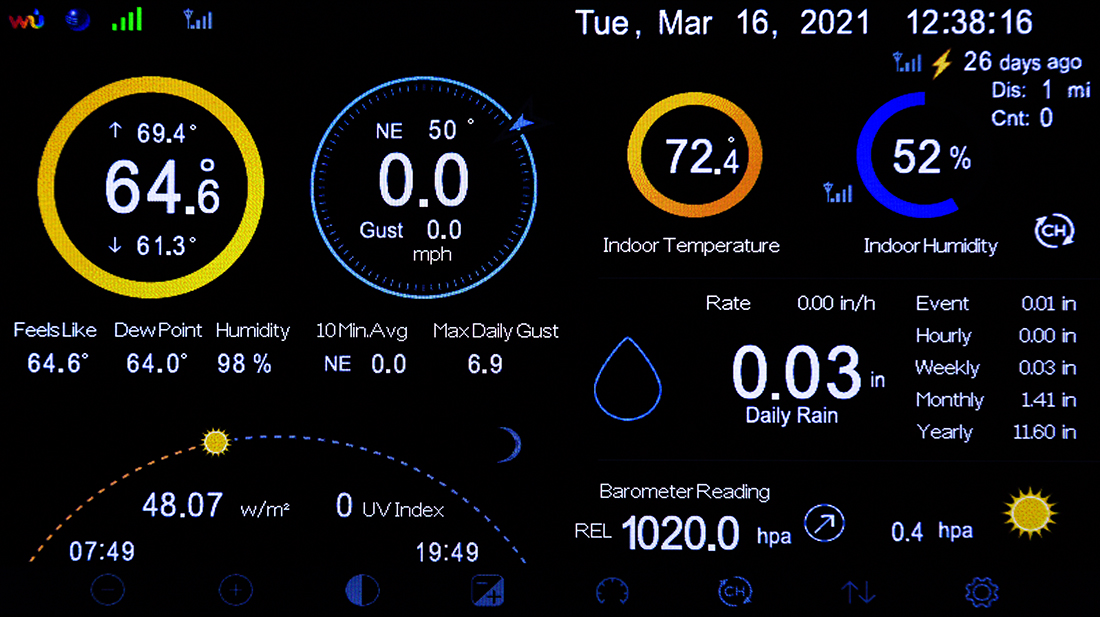
The Ambient Weather WS-2000 is my choice for a personal weather station. It has a good sensor array and an impressive display console. As is the case with all weather stations, you need to calibrate the instruments for your location. Unfortunately the WS-2000 manual (PDF) is rather lacking when it comes to calibrating the barometer. Page 52 has this simple instruction:
To determine the relative pressure for your location, locate an official reporting station near you (the internet is the best source for real time barometer conditions, such as Weather.com or Wunderground.com), and set your weather station to match the official reporting station.
This method of calibration will result in a wrong absolute pressure reading. For the casual weather observer this will be fine, however if you are sharing your observations with an official meteorological organization like the National Weather Service (via the Citizen Weather Observer Program) your absolute and relative pressure readings need to be accurate.
A better calibration method can be found in the Ecowitt HP3500 manual (PDF), pages 30-34. This Ecowitt model and the WS-2000 are produced by Fine Offset Electronics and share the same sensor array. Using the HP3500 instructions I created the following guide specifically for the WS-2000.
Why Calibrate?
There are two measurements of atmospheric pressure – absolute and relative. Absolute is the actual atmospheric pressure at a specific location. Relative uses the same location but extends the atmospheric pressure to sea-level. For example, at locations above sea-level relative adds the additional weight of air between sea-level and the altitude where the absolute pressure was observed. Relative pressure is the standard measurement used in meteorology since it provides a base line (sea-level) for every observation on earth.
A barometer reads absolute pressure. In order to calculate relative pressure you need to know the altitude of the barometer. This is a problem for the WS-2000 weather station – it does not know the altitude because there is no where to enter this information. However, the altitude can be entered indirectly.
Step 1 – Determine the Altitude of Your Barometer
Using the FreeMapTools Elevation Finder, find the location of your barometer on the map and note the elevation. This will be your ground elevation (mine is 630 feet or 192 meters). Now you need to determine how far above ground your barometer is located. In my case the barometer is mounted 5 feet (1.5 meters) above ground on a first floor wall. Add this distance to your ground elevation to find the altitude of your barometer. Example: 630 feet + 5 feet = 635 feet or 192 meters + 1.5 meters = 193.5 meters
Step 2 – Find Your Relative Pressure Offset
The offset can be found with the CSGNetwork Barometer Correction Calculator. Enter the Altitude from the previous step along with the standard sea-level barometer reading of 1013.25 millibars, then press Calculate.
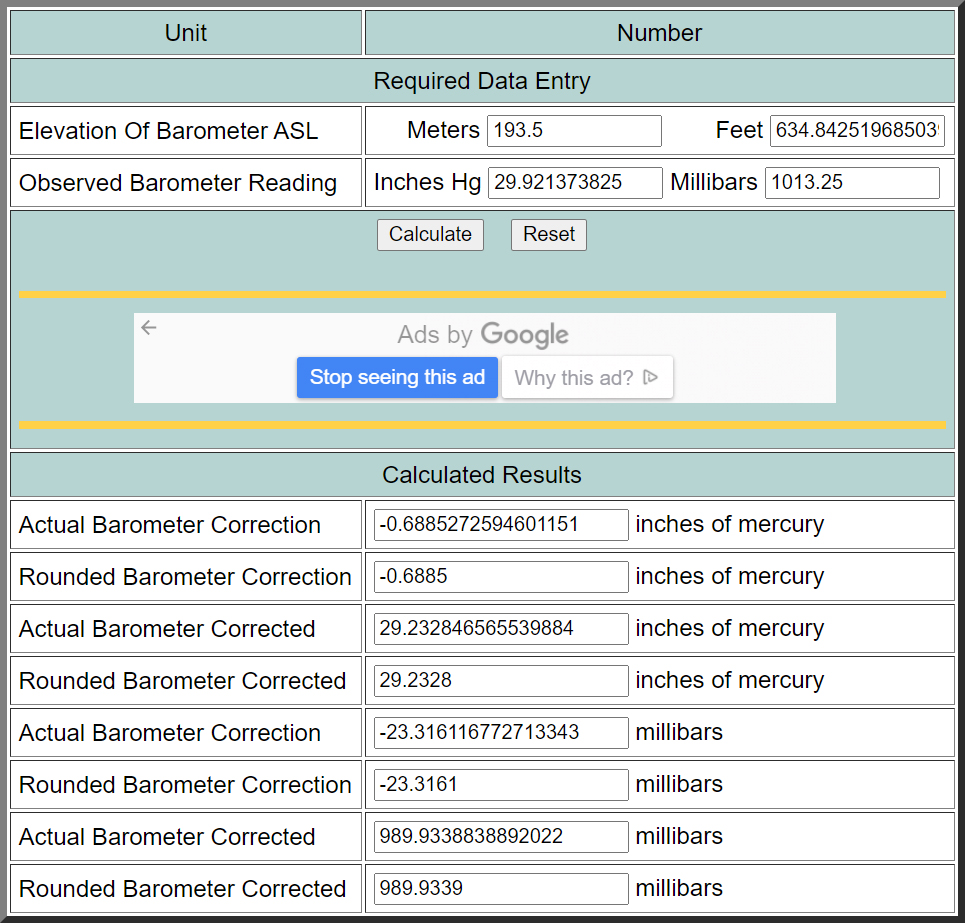
The inverse of the Barometer Correction in millibars is the offset you will need to enter into your WS-2000 console. In other words, if the Barometer Correction is negative (meaning your barometer is above sea-level) you will need to add this number in step 4. If the Barometer Correction is positive (meaning your barometer is below sea-level) you will need to subtract this number in step 4.
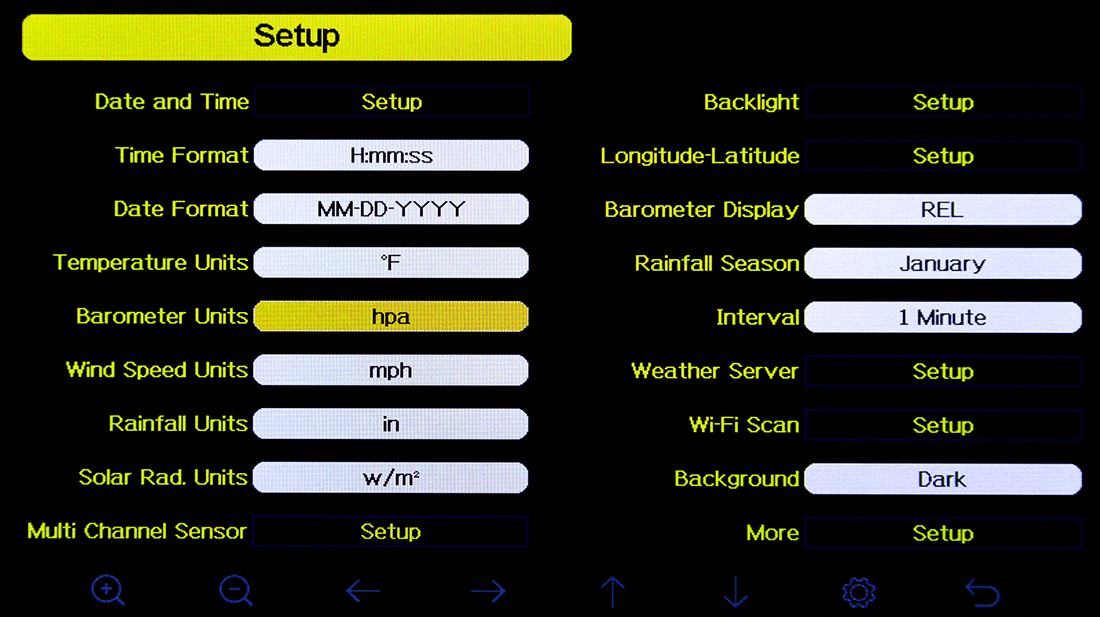
Step 3 – Change Barometer Unit (if necessary)
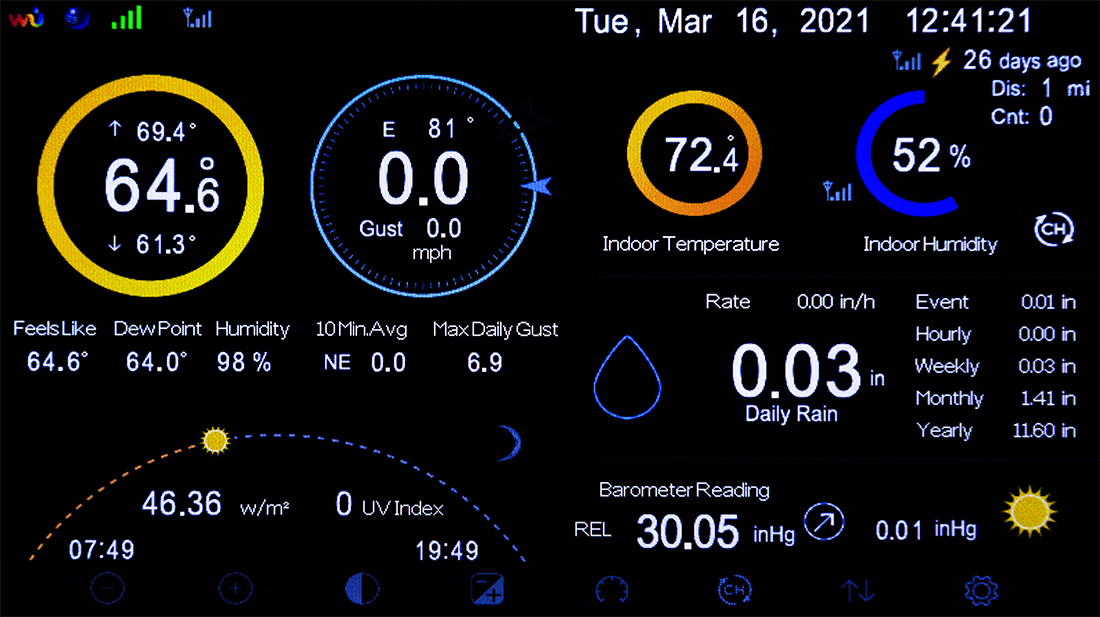
The offset value you found in the previous step was in millibars (mb) which is the same thing as hectoPascals (hPa). To make things easier and more accurate, the WS-2000 console needs to be configured to display hectoPascals. If your console is displaying the relative barometer reading as inches of mercury (inHg) or millimeters of mercury (mmHg) you will need to perform this step, otherwise skip to step 4.
To change the unit press the gear icon button to access the Setup menu. Next press the down arrow button until the Barometer Units is highlighted. Now use the the + or – buttons to select hpa. Finally, press the return button to save the selection and return to the main screen.
Step 4 – Adjust Relative Pressure
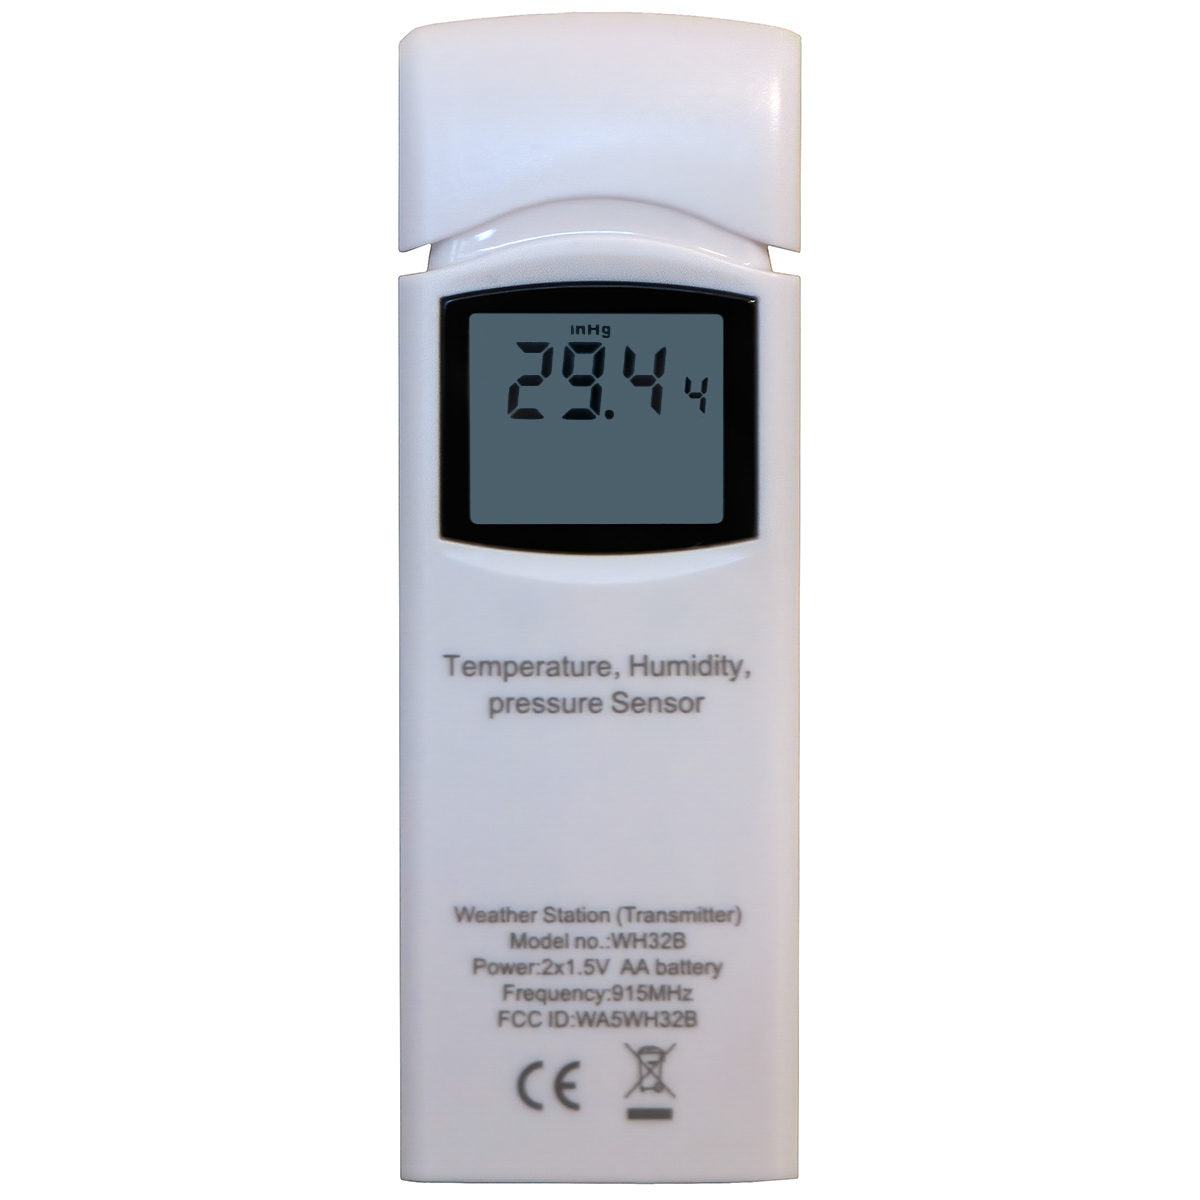
Note: I matched the absolute and relative readings with the reading on the WH32B sensor prior to starting this guide. In reality it does not matter what the absolute and relative readings are, the end result will be the same.
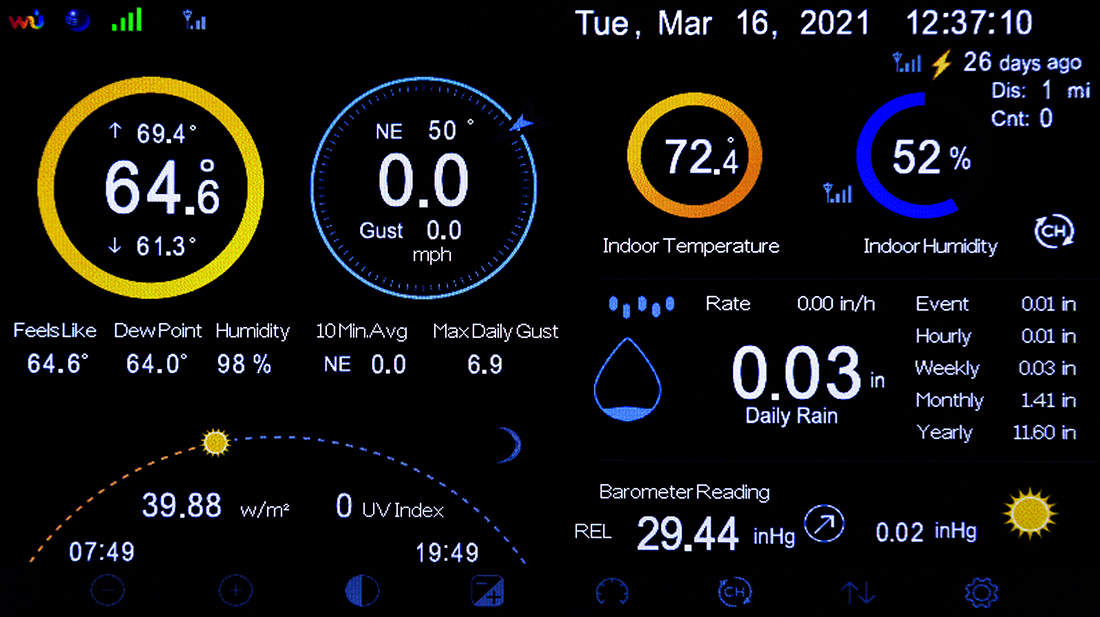
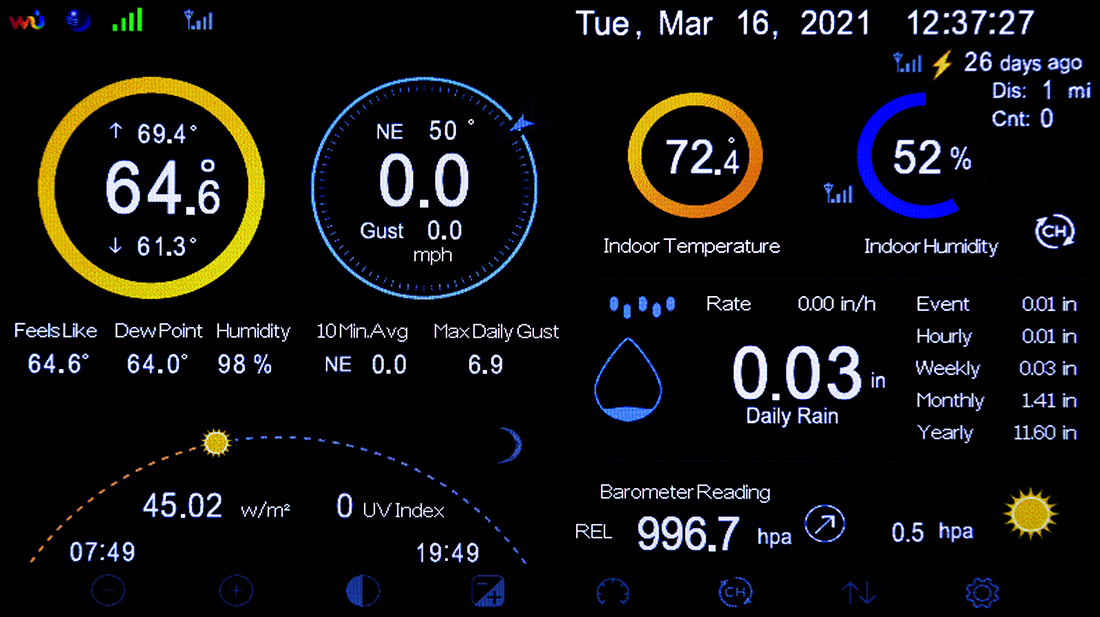
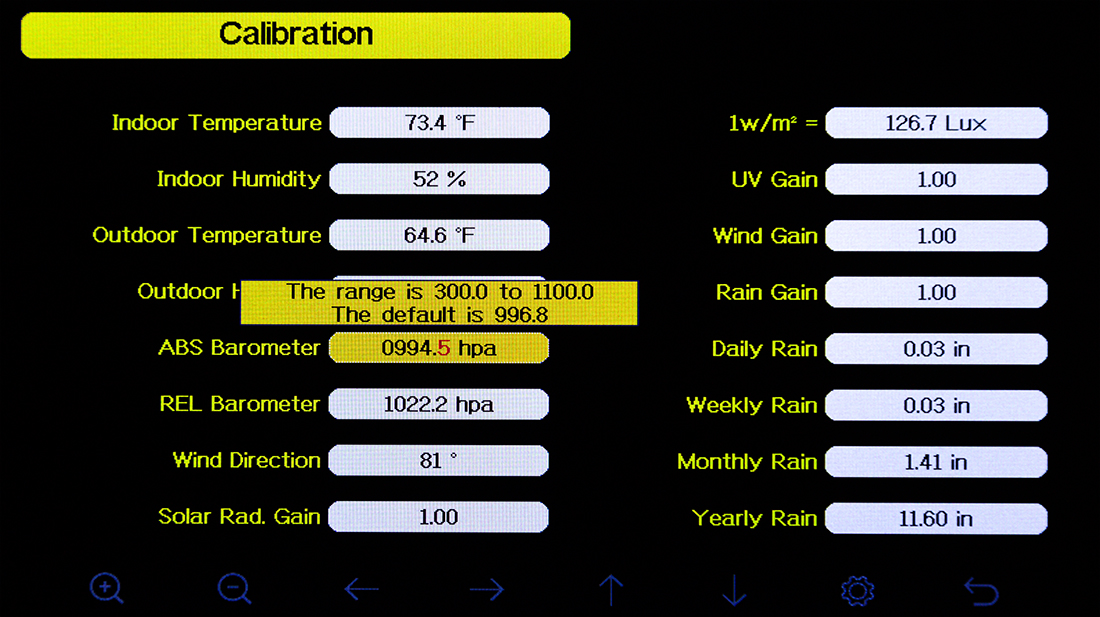
With your console displaying relative pressure in hectoPascals you now need to enter the offset found in step 2. To do this go to the Calibration menu by pressing the gear icon button three times (note the icon will change positions after the first press). From the Calibration menu press the down arrow button until the REL Barometer reading is highlighted. Add or subtract the offset by using the left and right arrow buttons to select the digit and the + and – buttons to change the value. When complete press the return button to save the change and return to the main screen.

What you just did with this step was assign an altitude to your relative pressure reading. If you ever decide to move your barometer to another location that is higher or lower than the current location you will need to perform this step again, otherwise this is the only time you will ever need to change the relative pressure.
Step 5 – Obtain the Current Local Pressure
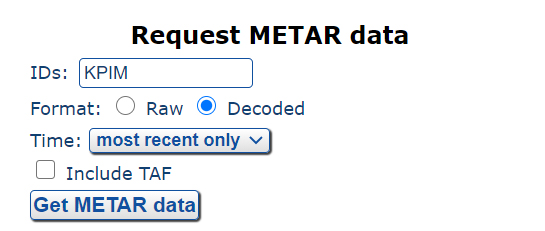
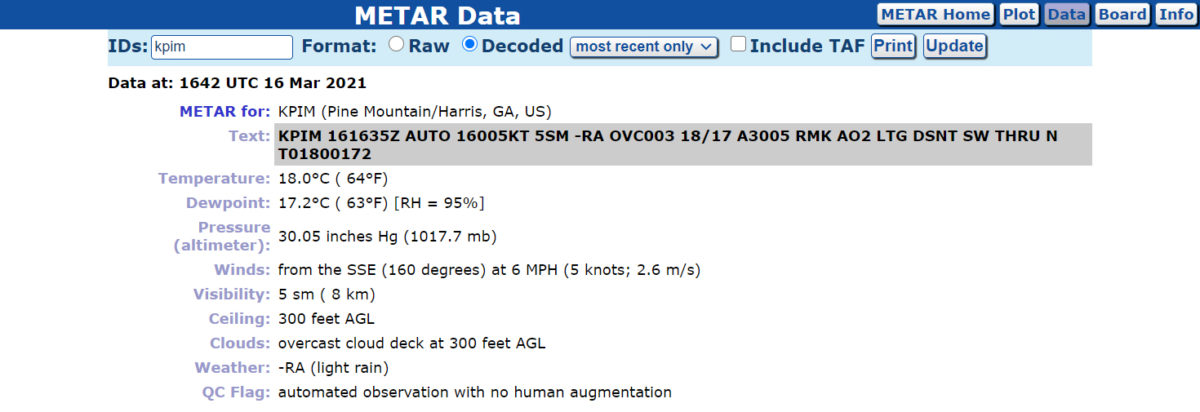
The next step is to get an accurate local pressure reading. The best source for this is a nearby airport that provides a METAR (METeorological Aerodrome Report). You need to know the ICAO (International Civil Aviation Organization) designation for the airport which can be found at the World Airport Codes website. With the designation noted, head over to the National Weather Service Aviation Weather Center. Enter the ICAO designation in the IDs field, select the decoded format, then press Get METAR data.
Take note of the pressure reading in millibars and what time the reading was made. For more accuracy try to make your barometer adjustment close to the METAR reading time.
Step 6 – Adjust Absolute Pressure
With your WS-2000 displaying relative pressure in hectoPascals, determine the difference between your relative barometer reading and the reading from the METAR.
If your relative barometer reading is less than the METAR you will need to add the difference to the absolute reading. If your relative barometer reading is more than the METAR you will need to subtract the difference from the absolute reading. To do this go back to the Configuration menu (press the gear button three times) and press the down arrow button until the ABS Barometer reading is highlighted. Add or subtract the difference found above by using the left and right arrow buttons to select the digit and the + and – buttons to change the value. When complete press the return button to save the change and return to the main screen. Note: Do not change the absolute and relative values at the same time, they need to be changed and saved separately.
Congratulations, your barometer is now calibrated. It is best to monitor the reading over several days and make adjustments as necessary. Remember, from now on only make adjustments using steps 5 and 6. Whatever change you make to the absolute pressure will automatically be made to the relative pressure.
The link in step 2 to obtain your correction takes you to the wrong place. Here is the updated link.
http://www.csgnetwork.com/barcorrecthcalc.html
Thank you, I have updated the link.